August 24, 2012

Adult Field Day 2012

Follow Me on Pinterest


This summer my friends and I had an "Adult Field Day" - and it was awesome!  I wish I could take credit for the idea, but my friend Lindsey thought of it and planned most of the day.
We had about 30 adults (and a handful of kids) and honestly had the time of our lives!

Before the event, Lindsey drew names out of a hat to select three teams.  She selected the guy and gals separately so they were spread evenly amongst the teams.  She let everyone know the teams ahead of time so we could dress in our team colors.

THE GAMES

The first 5 games had point values: 
1st place: 10 points
2nd place:  5 points
3rd place:  0 points

At the end of the 5 games we added up the points and the top 2 teams had a final game to play.

GAME #1
Water Balloon Volleyball


In this game, you split each team up into two groups - one on each side of a volleyball.  Each group holds onto a beach towel.  Place a bucket of water balloons on one side.


One of the groups loads a water balloon into the towel "sling shot" and launches it over the net.


The other group attempts to catch the water balloon in their beach towel.  The team with the most balloons caught in the allowed time - we did 2 minutes - is the winner!

GAME #2
Marble Toes

The object of the game is to "collect" the most marbles out of a kiddie pool filled with water.  The catch is... you have to use your toes!  Surprisingly harder than you might imagine....


The whole team gathers around the pool with one bucket next to the pool.  The pool is filled with water and a bunch of marbles.


One person at a time sticks their foot into the water and attempts to pick up a marble with their toes and place it in the designated bucket.  The next person can't begin until the first person has placed a marble in the bucket.


It is acceptable to pick up multiple marbles at a time.  If you knock over the bucket, the spilled marbles don't count... so be careful!  The team with the most marbles in the bucket at the end of the designated time - we did 2 minutes - is the winner!

GAME #3
Sack Race

Nothing special here... just your typical sack race.  Lindsey found the potato sacks online for pretty cheap.  I'm guessing a quick Google search would help you find plenty.
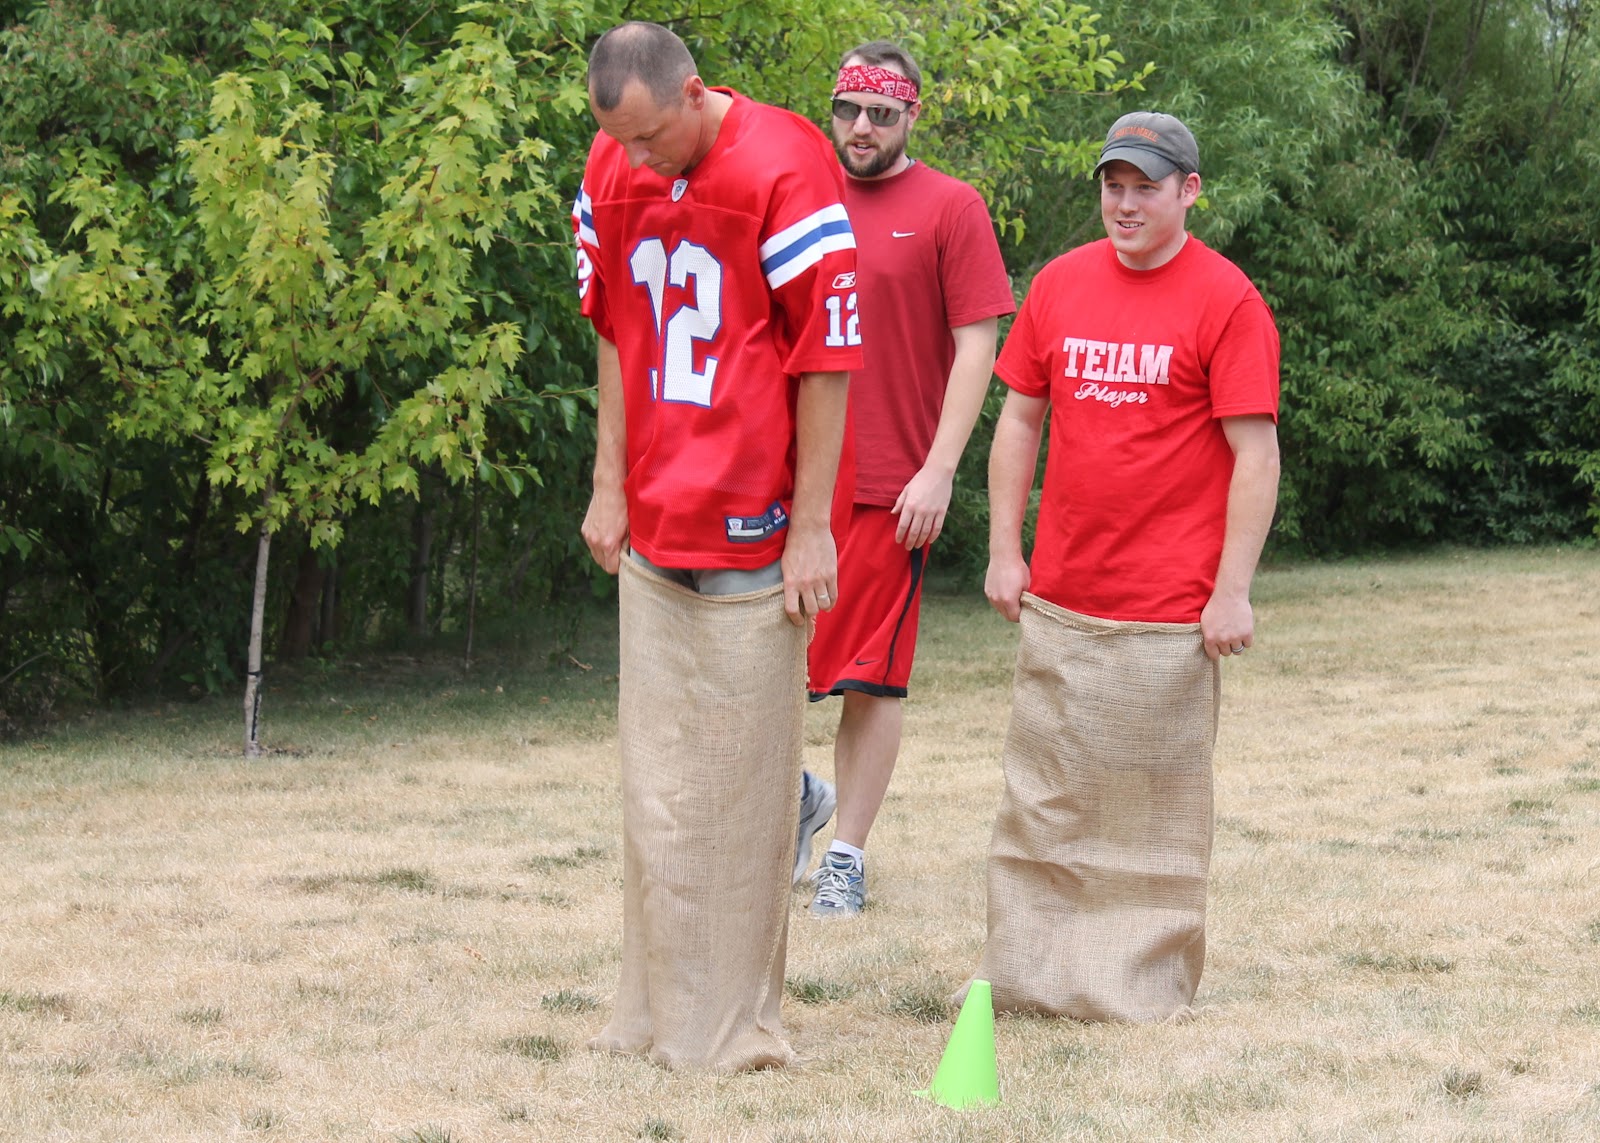

Set up a cone at a starting point.  One person at a time hops down to another cone and back - the next person goes when the first person crosses over the starting line.  Fastest time wins!


Don't forget to let the kiddos play too.  We let them play around in between games and they had a blast!


GAME #4
Ping Pong Bounce

Ok I'll admit - this wasn't my favorite game, but it was still fun - and challenging!


Take a long folding table and make two lines.  One person is the designated "catcher" and attempts to catch the ping pong balls into a cup.  The rest of the team lines up on the other end of the table with a box of the balls.


The bouncers have to bounce the ball (one time only) between the two lines.  The catcher has to stay behind the line closest to them and attempt to catch the ball.  It's really difficult to figure out the right strength and angle of the bounce in order to get it across the back line and into the cup!  The team with the most catches wins!

GAME #5
Egg Toss

This game works best if you have plenty of space - like a large yard or field.  Everyone on each team finds a partner (we chose to just do three "couples" per team).  All teams go at the same time on this game.


Each pair lines up across from one another.  Pass out eggs to one side of the pairs.  At the beginning, everyone should be just a few feet from each other in two parallel lines.  The side with the egg tosses it to the other side (everyone tosses at the same time).  Those who caught the egg take one step back - if you drop the egg or it breaks in your hand, your pair is out.


The key here is to have each throw happen at the same time, that way everyone is stepping back the same distance and you can easily gauge who the winner is.  The winner is the team who has the pair that throws - and catches - from the furthest distance.

FINAL ROUND:
4-event Relay

The top two teams after the first 5 games will face off in a 4-event Relay.  There should be 4 stations set up.  Everyone on the team must complete each station before moving onto the next.

Event 1: M&M Suck and Blow


Each person has to pick up an M&M out of a cup with a straw and drop it into a cup on the opposite side of the table.  One person goes at a time - whole team moves on when each person is successful.

Event 2: Watermelon Eating


Each team has one whole watermelon - pre-sliced into 4 slices (or more if you want).  This one is a free-for-all... eat until you can't eat any more, pass it onto another person, and do it all again.  Make sure you have a judge who determines when the watermelon is gone.  Once it's gone, the team moves on,

Event 3: Catch the Pencils


Each person holds 4 pencils on the back of their hand.  In one big motion, toss up the pencils and catch them in your hand (keeping your palm down).  This is derived from a "Minute to Win It" game so check it out there if you have any more questions.  Once everyone on the team has completed this successfully, move on to the last station.

Event 4:  Puzzle

I don't have a picture of this one, sorry.  In this event, there should be two puzzles laid out on a table.  These should be toddler-age puzzles, so about 15 pieces each.  Each team has to complete both puzzles.

The big winner is the team who completes all 4 events the fastest!


A FEW TIPS

If you're allowing kids, have plenty for them to do.  


We had a bouncy castle (they're pretty cheap to rent for a few hours), sprinkler, kiddie pool, and a sprinkler.  They mostly entertained themselves throughout the day.  We also had a few extra people on hand to help keep an eye on the young ones.  In think next year we'll even hire a few teenagers to watch the kids so no one feels obligated to leave the games to take care of a child.


Designate a Game Maker for the day.  Even better if they don't play the games (but not necessary).  This person is the one who coordinates and explains games, helps keep time (or designates a time keeper), settles disputes, and breaks up fights :)


Have other things to do too.  We had volleyball going before and after the official games.  Just something for people to do.

Also - have plenty of water on hand.  And it's never a bad idea to incorporate a pitch-in BBQ at the conclusion of the games.

We ended up spending several hours playing, eating, and hanging out.  It was a super duper fun day and we'll already talking about our 2nd Annual Games next year!!


August 22, 2012

Mimosa Bar

Follow Me on Pinterest

My sister-in-law's bridal shower ended up being PERFECT!  I met her other bridesmaids for the first time and absolutely love them.  I cannot wait for the wedding in October!!

One of my "jobs" for the shower was the mimosa bar.  We liked the idea of having some booze, but considering it was early afternoon we didn't want anything too heavy.  Mimosas seemed perfect!  And easy!  The mimosa bar idea was largely inspired by the gals at Kojo Designs (check them out!)


I had three mixers for the champagne: standard OJ, Peach nectar (recipe here),


and Strawberry Lemonade (recipe here - although I substituted pink lemonade instead of raspberry lemonade). 


The peach nectar and strawberry lemonade were both really delicious!  We ran out of both of them by the end of the shower, but had plenty of OJ left over!  Everyone had a great time trying out the different mixers.

A word of advice.... Keep plenty of napkins near the champagne.  A few guests filled their champagne a little too full and ended up overflowing with fizz!

Keep your garnishes simple, most people didn't even bother using them :)  Happy drinking!

Follow Me on Pinterest

August 21, 2012

1950's Bike Restoration


I love garage sales.  And by "love" I actually mean I'm totally obsessed and go almost every Saturday morning in the summer.  Sure, some days I come away with nothing but bags under my eyes... but other days I find GOLD.  Pure gold.

One of the amazing gems I found was this charming 1950's bike.  It was $25 and came with a lovely story.  The older woman selling the bike had been riding it since she was in high school and rode it up until a couple of years ago.  This woman is now 80 years old (and quite possibly the sweetest woman on the planet).  I gladly shelled out $25, stuffed the bike in my car, and crossed my fingers that my husband could help me restore it.


The bike was in surprisingly good shape for being over 70 years old!  A few rust spots and the paint was chipping in a few little places, but all in all it looked great!

Now, this isn't a tutorial (sorry), but I will say this was a relatively simple project but I will warn you that it was time consuming.  My husband took about a million pictures of the bike before and while he took it apart.  He labeled everything with what it was, where it went, which end was front, etc.


Next came stripping off the old paint.  I am fortunate enough to have a wonderful brother who has a sand blaster at work, so he helped get all the paint off in less than an hour.  You could do this with a sander too - just be prepared for a little more work.

Finally it was time to prime it then paint it!  I picked the pink because, well... I love pink.  We used a heavy-duty metal primer, indoor/outdoor paint, and several coats of a sealer so the paint is less likely to chip.

Here's my favorite part:


I used my Silhouette Cameo to cut flames out of white adhesive vinyl, stuck it on, and covered with more sealer.

My sweet hubby put the bike back together (he said it was easy since he had taken so many pics and labeled everything so well!).  We cleaned up the handle bars and de-greased the chain and chain guard. I think it looks fantastic!

To give it a test drive, we rode on a local bike trail a few miles for dinner.  It was really fun and I LOVE my new bike!!


Moral of the story.... you never know what you'll find at a garage sale.  Don't be afraid to take on a fun project like this one!

July 14, 2012

Personalized Water Bottles

Follow Me on Pinterest


As I mentioned in my last post, I'm preparing for my sister-in-law's bridal shower in a few weeks.  We are having a mimosa bar but wanted something for the non-boozers to drink.  Considering we'll be using champagne flutes for the mimosa bar, we didn't want to have to supply other cups for non-alcoholic drinks... so the Personalized Water Bottle idea was born!

I know you can buy personalized bottles and you can even buy just the personalized label to add to your own bottles - but there are plenty of sites with different ways to make them yourself.  I'm cheap  thrifty, so I decided I would make them myself.  I came across this post from a darling website called Glorious Treats with a simple way to make these.


Here's what you need:

Water Bottles
Scrapbook Paper
Packing Tape
Paper Cutter

To make the label itself, I just used my word processor (I have a Mac, so for me it was Pages - if you're a PC user, you can just use Word).  I was able to fit 5 labels to a page and I found that 8.5" was the perfect width for these bottles, which made it super simple (no trimming the paper on the sides)!  You'll want the height of each label to be just a little thinner than the width of your packing tape.  For example, my packing tape was 1.88"so the height of each label is 1.75"

I put a really light gray box around each label so I would know where to cut it.   Make sure to leave a bit of a blank space at one end since they'll overlap a little bit when you wrap it around the bottle.  I left a larger blank spot since I knew I'd be adding a sunflower sticker.  

I would recommend printing this out on a plain sheet of paper to test it our before printing on your scrapbook/colored paper.   Once you have the placement right, print it out on your scrapbook paper and use a paper cutter to cut out each label.  You can use scissors, but a paper cutter will insure that your lines are nice a straight.  Add stickers if desired.


The first step in assembly is to remove the existing label from your water bottles.  Try to find bottles with a label that's like a thin plastic, not paper.  The paper ones seemed to leave more of a sticky glue residue left on the bottle.  These ones with the plastic-y label came off really easily and left almost no glue behind.

Measure out a piece of packing tape that's about an inch longer than the label on each side.  The original blog said to lay the paper down and place a strip of packing tape over the paper.  I found it was easier to place the packing tape sticky side up on the table, then place the paper face down on the tape.  Again, you'll want the tape to extend about 1" on each side of the label and just a little bit at the top and bottom.


Line up the paper with the first ridge on the bottle (this will give you a nice guide to follow), stick down the extra tape on the end, and wrap the label around the bottle.


Hopefully you were able to wrap it straight around the bottle and you'll end up lined up at the other end.  If not, you should be able to pull off the label and start again.  Once you do this a time or two, you'll see it's pretty easy to get it straight.


And that's it!  Now, I'll warn you... I don't think these are necessarily water-proof.  So I wouldn't recommend throwing them in a big bucket of ice.  If you make the label a little smaller so the tape extend further at the top and bottom and is able to stick really well to the bottle, then it MIGHT be water-proof.  You've been warned.

Our plan is to keep these in the fridge and pull them out right before the guests arrive to the party.  Again, as I said in my last post... I'll take lots of pics at the shower and post how everything looks "in action."  Have a wonderful weekend everyone!
  Follow Me on Pinterest

July 4, 2012

Repurposed Beer/Pop Bottles

Follow Me on Pinterest


Oh, hello there.  It's been awhile....

I have been ridiculously busy with work, my apologies for taking F O R E V E R in getting a post up.  I'm working on a few items for my sister-in-law's bridal shower, so I'll be sharing those with you over the next few weeks.

The bride is a HUGE fan of the Pittsburgh Steelers - and that is an understatement.  She's such a huge fan that her wedding colors are black and yellow!  So me and the other bridesmaids agreed that a sunflower theme with lots of black and yellow would be appropriate for her shower.

She's also a big beer lover (I mean... aren't we all?!).  So I decided to try to incorporate that into the shower.  I have seen these painted bottles all over Pinterest, which I think are beautiful... but not quite what I needed.  I've also seen some beer/pop bottles wrapped in twine, jute, or yarn.  I also think these are great, but again... not quite what I was looking for!

So I combined a few of these ideas and ended up with these yellow bottles wrapped partly with jute and twine.

So here's what to do:

1. Drink beer (or pop if you prefer).  As if you need an excuse.  Save your bottles.

2. Remove the labels from the bottles.  I found that soaking them in hot water for a few minutes does the trick pretty well.  It even takes the sticky icky residue off!

3. Spray your bottles with Frosted Glass spray paint.  This will help the colored paint stick better, otherwise it will scratch off the glass very easily.  OPTIONAL - you can also paint the bottles with a spray primer over the frosted glass paint. This seems to help with the durability of the bottles, although the frosted glass paint may be enough if you don't anticipate much abuse to the bottles.

4. Paint your bottles in the desired color.  I'm not particular to brand.  I use Rustoleum a lot because it's pretty inexpensive and they have lots of fun colors.  Whatever you do, don't by spray paint from JoAnn or Michales - it's REALLY expensive there.  Try Hobby Lobby or even Lowes or Home Depot.  You can find the same exact paint there for about 1/2 the price.

5. After the bottles have dried, wrap them in jute and/or twine to your liking.

6. Sit back and look at what you've accomplished!


Here's a closer look.  You can see that I made them all a little different.  Some I used a thin twine and wrapped it all jee jobber (that's my husband's favorite word and I promised him I'd use it in a blog some day, so today's his day!).  Some I wrapped very neatly with the thin twine.  And others I used a thicker jute.  I found some wonderful jute at JoAnn for about $3 for a huge roll - it's in the jewelry section if you're looking!

I think I plan on putting sunflowers in all of them, but I may end up leaving some of them without flowers just as decoration.  The Bridal Shower is in August, so I'll be sure to post some pics of them "in action."

Now, go drink :)
  Follow Me on Pinterest