February 4, 2012

Decorative Balls


I made the rope bowl a few weeks ago (see it here) and needed something to put in it.  I found this idea on bhg.com and made the fabric wrapped balls.  Unfortunately my laptop fried recently and I wasn't able to recover the pictures I took to create a tutorial.  Laptop is back in business now, but I lost a handful of pictures :(

I ran out of fabric and had one ball left, so I decided to do something a little different with it.  Here's what I ended up with:


 I started with some silver thumbtacks I found at the dollar store (and a Bud Light, hehe)


 I just started at the top and began to work my way down, placing the thumbtacks in a circle around the middle.

I did two "layers" in one direction around the ball, then 2 "layers" in the other direction.  This helps the thumbtacks lay a little better against the ball - plus I think it looks better.  There is a seam in the middle of the ball which was a good reference point to try to keep the circles even.

But it's ok if your circles of tacks aren't perfect, I promise it will look ok!  You can keep going with the circles all the way to the bottom, but I chose to stop here:

You won't see the bottom of it in the bowl anyway, so I chose to save some time and thumbtacks and stop there.  I love the way it turned out and I love the one different ball mixed in with the fabric balls.

                                       
Happy creating, friends!

February 2, 2012

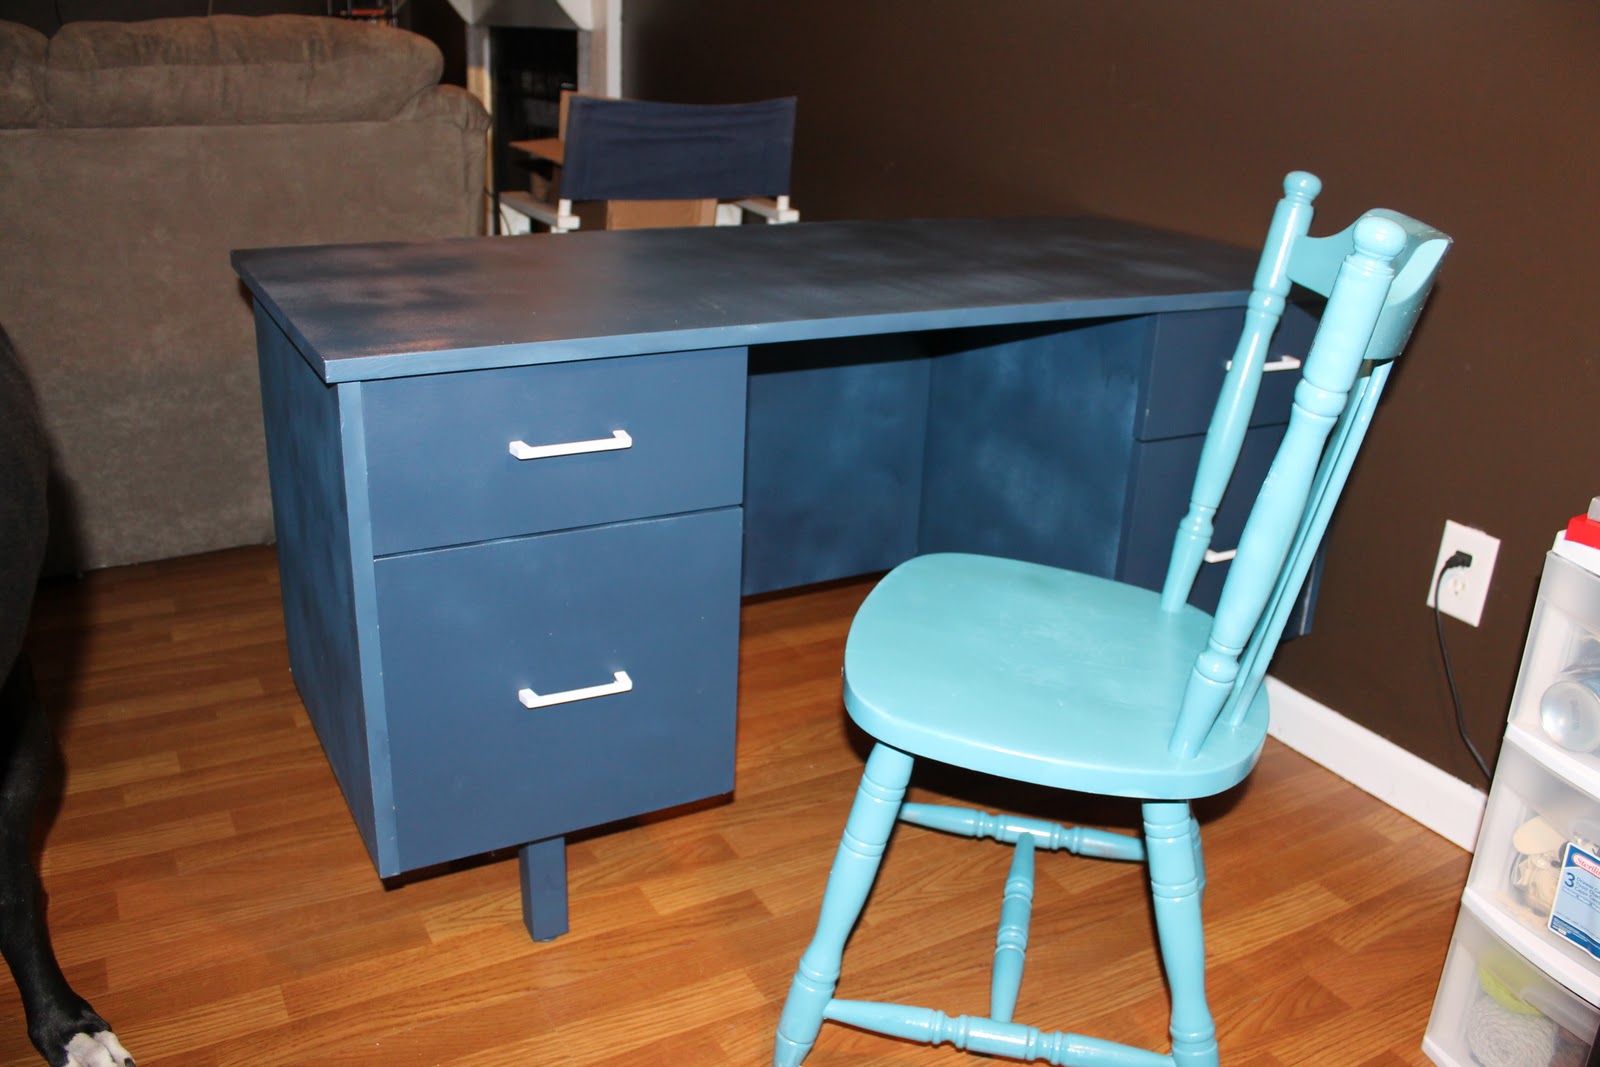
Desk Repurpose

So, as I started all my crafting and creating, I quickly realized I needed a work and storage space.  I had been using our dining room table, which my husband was not too thrilled with come dinner time!  And I was storing my supplies in the spare bedroom, which was a problem when we had guests over Christmas!

So I started the hunt for a desk and chair at our local thrift stores.  I finally found this desk and chair at Goodwill.

Our local Goodwill stores offer 20% off a $20 purchase every Friday (through their Facebook page) PLUS 10% off a $20 purchase every day if you carry one of their "rewards" cards.  Apparently you can use both of those discounts on Fridays, making this desk and chair just under $25!

This was my first time spray painting furniture, and I sure did learn a lot.... mostly what NOT to do!  I used a bonding primer, but brushed it on, leaving brush marks.  I sprayed the colors on a little too thick leaving some drips and I sprayed on layers before the previous layer was dry, making the finish a little splotchy.  I also didn't put any kind of finish on it, so it's already starting to scratch and chip a little bit :(

I'm planning on stenciling a pattern on the top (one of these days....).  But I can say I learned a LOT about painting furniture!  I repurposed a book case that I now use as a china cabinet - which I'll show another day - and it turned out a million times better!  More on that to come :)

February 1, 2012

Sisal Rope Bowl

Follow Me on Pinterest


I fell in love with the rope-wrapped bowl I saw in this tutorial from centsationalgirl.com (check out the site, it's aaahhhh-mazing!).  So of course, I had to try it!

I found this metal container at Goodwill for $1.99.  


The sisal rope came from Lowes and was about $6 - but I have plenty left over for another container!  All you have to do is hot glue the rope around the container, it was SO easy.  Wrap the rope around the handles as well.


The original tutorial suggested wrapping the rope inside the container as well.  I chose to fill the bowl with fabric-wrapped styrofoam balls, so I didn't see a need to do the inside.  See how to make the balls here.

Here is the final product, displayed beautifully on the console table I repurposed (I'll have a tutorial on that another day!).


Happy creating, friends!


Follow Me on Pinterest

January 20, 2012

$5 DIY Wedding or Anniversary Gift


So my mom's birthday is this month and I wanted to make something really special and unique for her.  After seeing this "Love Map" on Pinterest, I decided to do something similar.  

My wonderful mama was remarried on 7-3-04 and they currently live on a ranch near Waco, TX.  The original idea was to include the cities where the couple met, married, and currently live.  Since my mom and step-dad met and married in Indianapolis, I thought it would be less interesting.  So instead, I decided to include the dates and location of their births.  So my variation shows my step-dad's birthdate and location - Indianapolis, IN; my mom's birthdate and location - Buffalo, NY; and their wedding date and location - Waco, TX.  I quite like the way it turned out :)  Ok, so here's how I did it:

I found this frame at Goodwill for $3


Nice, huh? I saw the potential!  I removed the ugly lovely pictures and the matting and used the cardboard "filler" behind it as my base.  I covered the cardboard with a few pieces of scrapbook paper like this:


Once that was done, I used my Silhouette Cameo to create the states and the dates on adhesive vinyl and stuck it all on there.  If you don't have a Silhouette or a similar die cutting machine, you could easily do this with an exacto or even just a pair of scissors.  

After I had all the pieces on, I decided it needed more of a separation between the colors so I just glued a piece of white yarn between the different colors.  Sorry, I didn't take a picture of this step.  Hey, I'm new at this! :)  Here's the back where you can see the yarn taped to the back


I spray painted the frame with Rustoleum Oil Rubbed Bronze.  And ended up with the final product!  


Total cost was about $5 for the frame, spray paint, scrapbook paper, and adhesive vinyl.  Not bad!  I can't wait to send it to my mom in Texas!  I'd love to know what you think or if you create your own, I'd love to see it!  Happy creating, friends!

Melissa

January 19, 2012

Welcome to my first ever blog post!


Oh my.  I have a blog....  Hah!  Ok, focus Melissa.

I come from a long line of artists.  My grandmother did beautiful watercolor portraits.  My dad is a successful cartoonist who works for Jim Davis - the creator of Garfield - and animates much of what you see at www.garfield.com (go check it out!).  My mom is a "visionary" and makes some wonderful and creative scrapbooks, has beautiful gardens, is a talented photographer, and can decorate a home beautifully.
My brother is talented in just about any type of 3-D art and has become a wonderful glass artist.  He creates some of the most beautiful hand blown glass I have ever seen.  Here is one of his pieces:


Unfortunately very little of that talent was passed to me.  I have always been creative, so here I am, channeling my creativity!  I have always loved to create "something out of nothing," and love to scour thrift stores and see what treasures I can make from other peoples' junk.

And then came Pinterest!  All of a sudden there were millions upon millions of ideas at my fingertips.  To say I was greatly inspired would be an understatement.  After pinning gazillions of these ideas and inspirations, I finally decided to start creating... and I haven't stopped!  Now I'd like to try to inspire others as I have been inspired.  Having one-of-a-kind items in your home, created by YOU, is such an amazing feeling.  I hope to inspire you and I hope that I can be inspired by you too!